Apostrophy Designs: June 2011

The Tie-Dye Twist {Tutorial}

I babysit a few kids a couple days a week and every Summer we try to come up with a fun activity to do.

This Summer they wanted to tie-dye shirts, but due to the vary ages I didn't want to mess with buckets of dyes, salts and all the other mess associated with tie-dying.

So with the idea spark from a good friend of my Holly Hox and a little browsing through Hobby Lobby.

We started with plain white T-shirts and Elmer's glue. Because Elmer's glue is washable you can draw a picture onto your T-shirt and it will block the dye from coloring the T-shirt.

For Bergen's shirt I drew a butterfly...and after the Elmer's glue had dried completely I pulled out the tumble dry that I bought from Hobby Lobby.
We used each of the spray bottles and colored the shirts. After the paint had dried completely I put the shirt in the dryer for 20 minutes to heat set the paint {That's why I chose tumble dry, because the paint is completely washable until you heat set the dried paint!! Perfect for little kiddos!}


Then I washed the shirts in warm water and dried them on low...and behold you will have a butterfly t-shirt with a cool tie-dye twist!


This shirt is perfect for any little diva!

**Side note on time -- depending on how much Elmer's glue your little ones use it can take awhile for the glue to dry, if you need to speed things up we put them out in the sun and even used a blow dryer!**

Some of us even turned our shirts out to have a cute patriotic twist! I loved them all!

Shop Update -- Zipper Bags


Just wanted to let you know I have started to update my Apostrophy Shop with some of my left overs from Summerfest and I started with the popular Brightly Colored Zipper Bags...

OMTWI Beach Bash: Beach Towel Rompers {Tutorial with a few EDITS}

I can't believe I won the WHOLE SHEBANG over at ONE MONTH TO WIN IT!!

Thanks everyone for your votes and to my family for putting up with my craziness...I think I should mention I made these rompers while participating in Summerfest, and it was pretty crazy because of the lack of sleep thing going on...but I am still very happy with how they turned out!

My nieces Brinlee and Brooklyn both wore them to their family reunion this week at Bear Lake and loved having them and also got lots of compliments.

 From BEACH TOWEL to BEACH WOW! You are going to love these Beach Towel Rompers for all of your Beach Bash Parties this Summer!

 Each Beach Towel Romper is made of a single towel and fits perfectly over your swim suit. Wear the Beach Romper to the Beach or to all of your Pool Parties this Summer. 

There was even had enough towel left over to make a coordinating beach bag!

You guys coming to the BEACH PARTY??

TUTORIAL:

 Depending on how tall your model is you should be able to get one romper out of one towel... **Sorry I was in a mad dash to get these made before Summerfest and then before a family reunion so the pictures were taken on my nieces ipod.**

STEP ONE -- Fold your towel in half and figure out the width needed for the romper. I wrapped it from armpit to armpit and added about 4 inches.

STEP TWO -- Cut the towel into a big rectangle, using your measurements.

STEP THREE -- The perfect thing about using towels is using the bottom of the towel to hem your leg holes, this saves lots of time!

Fold the towel with right sides facing each other and cut a slit directly into the middle, about 3 inches up. This will section your leg holes in half.


STEP FOUR -- Sew along the sides with 5/8" of an inch. To finish the edge you can either serge them or a zig zag stitch works just fine!! Next sew along the inner leg seams with 5/8" and finish seams, I actually double stitched this area because I was afraid of seams ripping.

STEP FIVE -- Try the romper on your model to assess how high the top band will need to be. Fold the top of the towel down and trim excess towel off. Double band over and create an elastic casing.


Step SIX -- Try the romper on your model again {at this point they may or may not be happy with you...} and find the waist on your model. Mark the area off and prepare to make an elastic waist casing... the best tutorial I direct you to for this is actually from DANA at MADE from her cute T-shirt Dress, it's step #8. **Side note I didn't double up the band like DANA tutorial suggests, the towel would be too thick!! eek! I just hemmed the top and bottom  and then proceeded to attach the material to the romper. (Thanks for the feedback on this!!)


STEP SEVEN -- After you get your waist banding on I added some straps just below the casing on both sides to create a halter look. The straps were 2 in x 18 in and sewn a few inches in from the armpits. (This step could be optional if you would prefer the strapless look over the halter look.)


Hope this helps you enjoy your Summer a little more, we finally got the sun to shine here in Utah so we will be using our lots this week!

Indication of a Fun, Busy, Crazy Summer...

This week has been the first week that the weather has actually felt like Summer here in Utah. 

Sheesh!! AND IT IS ALMOST JULY!

Other than the weather, here is my main indicator that reminds me {almost daily} that it's Summer...


We have been so busy that naps times have been compromised on most days, thank goodness Bergen has gotten comfortable sleeping just about anywhere.

{Bad Mom! Bad Mom!}

Hope you are having a fun, busy, crazy, sleepy, warm, sunny Summer...
I'll be back next week to show off the fun crafts we've cooked up so far this Summer!!

Made It On Monday : Guest Posting

Today I am guest posting over at the fabulous Blog, Made it on Monday.

You may remember Jill as one of my fellow contestants on SYTYC, she won third place with all of her amazing crafts.

I feel honored to be a guest over there and hope that you wouldn't mind popping over and showing me so love! 

Today I hit the 6 month mark of being pregnant, and mostly because I have babies on the brain...I am shared one of my go to baby gifts, the Perfect Corner Blanket.


Just when you thought I was over Chevron, I go and do something like this! :)

Occupational Hazard

I had a few people ask me where I got the idea for the toothbrush bracelets, and though I didn't invent them out of thin air ,I do have an occupation hazardous past when it comes to teeth...

While in high school and for my first year outside of high school, I attended a Dental Assisting program at a local vocational school. It was while I was in this program that I met a fun group of girls and one night while attending the UDA Conference and we made toothbrush bracelets...

 {Emily, Keesa, Me, Court, & Cambria in our hotel night before the 2004 UDA Conference}

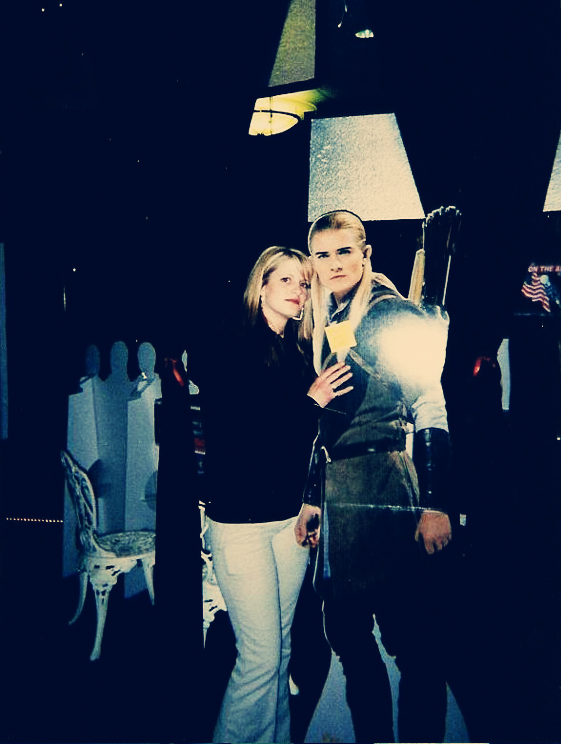
{I had a thing for Lord of the rings... what can I say? That post it note actually said "Take me home!" ha ha! This was also from the same night that we went down to SLC for the conference.}

I loved teeth and still do! I went on and became a certified dental assistant in the state of Utah and worked for a few years as a Orthodontic Assistant. 

A few years later, as a recent newlywed and after just buying a house, I had a really bad experience with my employer and so I QUIT! {Looooong story and I hate admitting that I quit anything...but my morals were questioned} So I decided to go to college and got my degree in Business Administration/Marketing. Best decision ever!!

Funny how my plans I had made for myself waaay back when {I'm getting old!} have changed...of course for the better. It was just fun to make those bracelets again with my nieces and nephews and remind them that I do know a thing or two about teeth and hygiene! :)

OMTWI Kids Craft: Toothbrush Bracelets {Tutorial}


Are your kids already bored this Summer? 

I have a solution! A kid friendly, easy-to-do, adult supervision required Kid Craft: Toothbrush Bracelets!


They can be new or old plastic toothbrushes.  Just round up a bunch of kids, you can even invite the neighbors. Don't forget to have them bring their toothbrush.

The color options are endless and they are a breeze to make.


Using a Toothbrush has NEVER been so fun!!

TUTORIAL:

 Ok FIRST let's talk toothbrushes. In order to make the tooth brush bracelets you need tooth brushes that are 100 % plastic.

I got really excited when I found a bunch at the dollar store but because they are made of recycled plastic the won't bend like we want them to for the bracelets.

The best one's I found were at Wal-mart. They were in a pack of four for about $4.98, which ends up costing a little over a dollar a toothbrush...not too bad! I also found the ones that are clear with plastic striping bent better than the ones that were all plastic.

**Also, I will add that this craft can be made by kids and for kids but done completely with ADULT supervision due to the need to boil water.**

SUPPLIES:
pliers, one saucepan full of boiling water, one saucepan full of cold water, a thick dish towel, and your willing participants.


Step 1 -- You will need to pull the bristles out of the tooth brushes. I found that if you stuck the HEAD of the toothbrush in the hot water for 30 seconds and then bend the head back, it will open up the bristle holes making them easier to pull out. Do this step near a garbage can because the bristles can get messy!

Step 2 -- Place the WHOLE toothbrushes into the boiling water for about 3-5 minutes.

**I had a concerned parent who made a comment about not wanting to use a gross used toothbrush on their child. Through boiling the head of the toothbrush and then boiling the whole toothbrush for a few minutes, should rid of all the gross germies!**


Step 3 -- Remove the toothbrushes from the boiling water with your pliers and bend them into shape with your dish towel. We made ours into an oval shape and that seemed to work out pretty good. However, when you are done if you don't like the shape you can put them back into the boiling water and keep trying to get the best shape.


Step 4 -- Once you have shaped the brush drop them into the cold water to help cool off.

Hope you enjoy these bracelets like we have and that they will help you have a the best Summer!

If you have any other questions let me know!

Father's Day + Mom's Birthday

I am so thankful today for the Dad's out there. I love Adam and thankful for him and everything he does.

Matter of fact I made quite a mess of the house this past week and after the first night of Summerfest was done I came home to a clean house, the second night folded laundry, and the last night a fully cleaned car. What an amazing man!!!

Lately Adam and Bergs have been taking bike rides and I must say she is also quite in love with him as I am!! She can't wait for her Dad to get home from work so they can play together.

Next is my Dad. I have so many fond memories of him growing up and find myself getting teary these days when I talk to other people about him. He is the most easy going, humble man I know. Growing up his patience frustrated me  because I felt {and still do} I needed a direct answer, but now I realize sometimes there is more understand and learning in patience than always knowing the what and why. I have learned many more things from him, I wish I could share them all with you...just know he is an amazing man and example to all of us.

Today also happens to be my Mom's birthday, she would've been 63. There are not enough words to describe my Mom, so I will just say that I love her dearly. I can tell you I wasn't alone, I still have people stop me and tell me stories about her...I wish I could write them all down.

We took some balloons over to her grave and sang Happy Birthday and then let them go...


Bergen is not that fond of Balloons but was completely enamored by them in the sky...

Happy Birthday Mom/Grandma...We LOVE you!

Summerfest Booth

I am so happy with how the booth turned out...so much brighter and cuter than last year!

We had a busy day despite the wacky weather! We hope to see more of you there sometime this weekend!

Zipper Necklaces and Big Red

Last minute I whipped out a few Zipper Bib Necklaces...They are a bit different than I usually do them but turned out so bright and fun, just perfect for SUMMER!

So please come visit us at Summerfest, I know the weather may not be too promising...but please come say a quick hello.

You will be able to find us by our BIG RED bench. It's Bergs favorite.

{I'm booth 78, 3 up from the corner -- right across from Center Street Grill! Hope to see you there!}

Zipper Bags

 
I already posted a sneak peek of the new zipper pouches...but I forgot to show you the best part...

The FUN colored INSIDES....


I really enjoyed making them, I hope you ENJOY them too!


Sewing Tape Watches and Zipper Pull Earrings

I am really excited about these things for the Summerfest, mostly because I consider them sort of a Door Buster.

I only have about a dozen of the watches and will be selling them for a steal of a deal! Be sure to stop by and check them out.

Next are my earrings, I only really break these out for special occasions so you will have to come see all of the new cute ones. 

I have fallen in love with a few pairs and  have been going back and forth on selling them...

See if you pick out one of the pairs I'm talking about...

See you on Thursday!

Summerfest 2011

 I am in full preperation this week for the upcoming Summefest this weekend! I will have all of my zipper stuff in their glory but I came up with a few new things I'd love to show too!

First up are these adorable Ruffle Cuffs.
 
They are made with elastic out of cotton material and topped off with some satin flowers and cute buttons.


I couldn't help but put this last picture on here, I love the faces she pulls! Thanks Brook and Brin for modeling!!!

P.S. I am still in it over at One Month To Win It...go on and vote for your fave (and my project ;) )

Powered by Blogger.